熟悉了做 web 开发同学有没有想过,是否可以使用 html、css 和 js 开发桌面应用?答案是肯定的。 Javascript 除了可以写后端外(node.js),现在也可以写桌面程序了。Elecron 将 node 和 Chromium 结合, 利用 Chromium 做页面显示,同时提供 native api 来做底层操作系统交互。
1. Hello world
先跟随官网的例子做个 hello world.
# 安装 electron 全局命令
npm install electron-prebuilt -g
创建应用程序目录, 例如就叫 your-app,然后继续创建其他文件,目录结构如下。
your-app/
├── package.json
├── main.js
└── index.html
package.json
{
  "name"    : "your-app",
  "version" : "0.1.0",
  "main"    : "main.js"
}
main.js
var app = require('app');  // Module to control application life.
var BrowserWindow = require('browser-window');  // Module to create native browser window.

// Report crashes to our server.
require('crash-reporter').start();

// Keep a global reference of the window object, if you don't, the window will
// be closed automatically when the JavaScript object is GCed.
var mainWindow = null;

// Quit when all windows are closed.
app.on('window-all-closed', function() {
  // On OS X it is common for applications and their menu bar
  // to stay active until the user quits explicitly with Cmd + Q
  if (process.platform != 'darwin') {
    app.quit();
  }
});

// This method will be called when Electron has finished
// initialization and is ready to create browser windows.
app.on('ready', function() {
  // Create the browser window.
  mainWindow = new BrowserWindow({width: 800, height: 600});

  // and load the index.html of the app.
  mainWindow.loadUrl('file://' + __dirname + '/index.html');

  // Open the devtools.
  mainWindow.openDevTools();

  // Emitted when the window is closed.
  mainWindow.on('closed', function() {
    // Dereference the window object, usually you would store windows
    // in an array if your app supports multi windows, this is the time
    // when you should delete the corresponding element.
    mainWindow = null;
  });
});
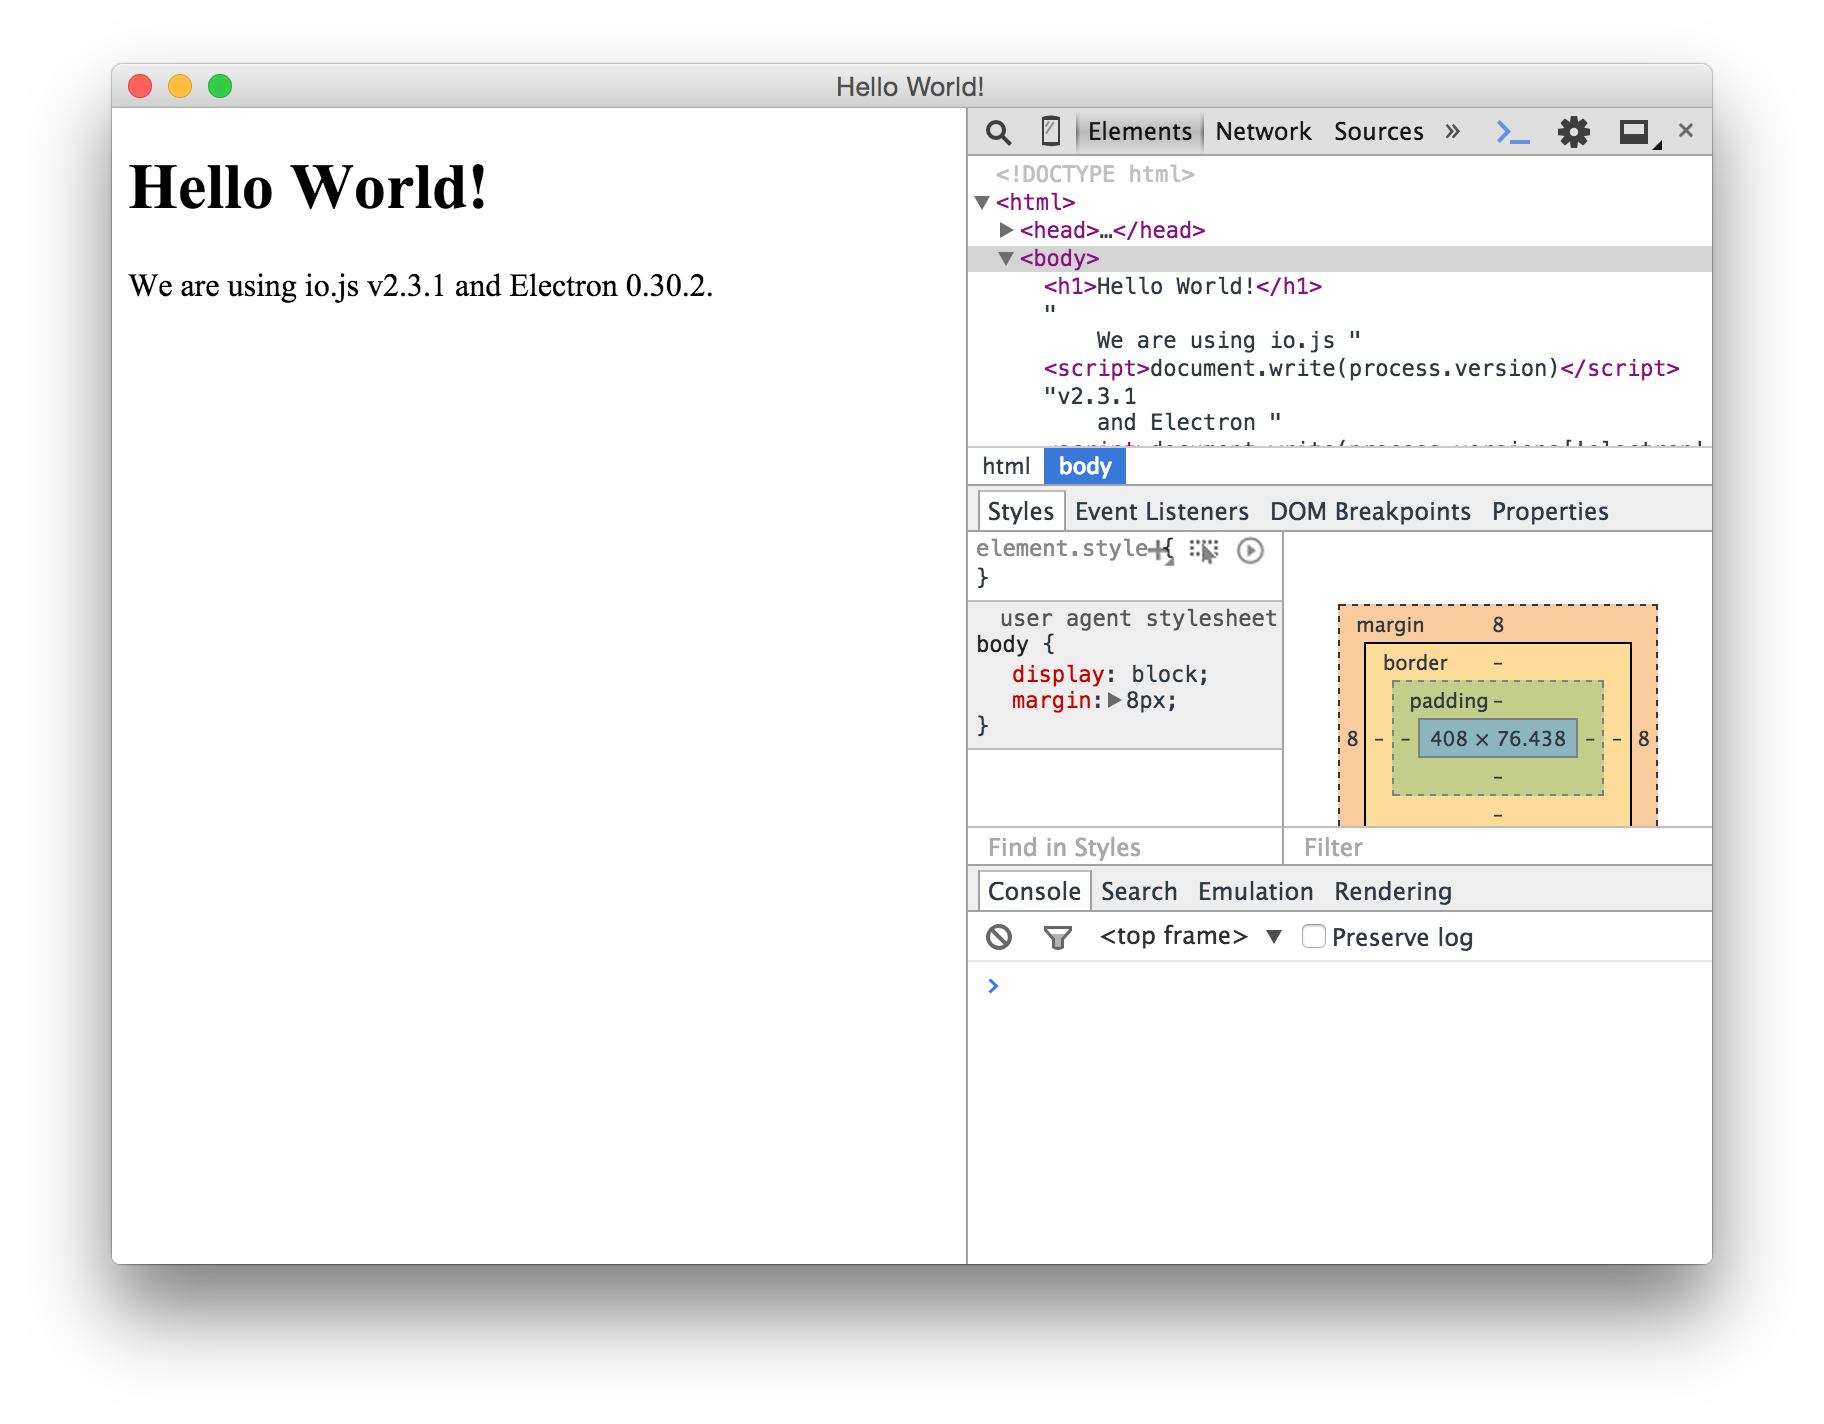
index.html
<!DOCTYPE html>
<html>
  <head>
    <title>Hello World!</title>
  </head>
  <body>
    <h1>Hello World!</h1>
    We are using io.js <script>document.write(process.version)</script>
    and Electron <script>document.write(process.versions['electron'])</script>.
  </body>
</html>
添加完以上文件后,就可以运行了。
cd your-app
# 运行程序
electron .
2. 加入交互逻辑
修改 index.html,在 body结束标签前加入以下代码,实现点击按钮弹出 alert 效果。
<body>
  ....


  <button id="button">Click me</button>

  <script type="text/javascript">
    document.getElementById('button').addEventListener('click', function(){
      alert("It's me");
    })
  </script>
</body>
接下来重构下代码,把页面的js代码抽出来,放到 index.js 文件里。
index.js
document.getElementById('button').addEventListener('click', function(){
  alert("It's me");
})
然后 index.html 改为
  <script src="index.js"></script>
</body>
3. 加入 jQuery
如果接下来逻辑越来越复杂,使用原生 API 开发先得力不从心。这时候引入开发利器 jQuery,首选使用 bower 安装。
bower install jquery
引用 jQuery 不能想之前那样直接在 html 通过 script 标签引用,而是在 index.js 文件通过 require 函数引用。
window.$ = window.jQuery = require('./bower_components/jquery/dist/jquery.min.js')
$(function() {
  $('#button').click(function() {
    alert("It's me")
  })
})
4. 使用底层 API
开发桌面引用必然会使用到系统底层API, 例如直接操作文件,调用系统文件选择器等。接下来实现一个选择本地文件, 然后将文件内容输出到页面。
index.html
<button id="chooseFile">Choose File</button>
<p id="output"></p>
index.js
// 因为 dialog 模块是属于主进程的(main process),渲染进程(render process)要使用 dialog,
// 可以通过 remote 模块,remote 是这两个进程之间的桥梁。
var remote = require('remote');
var dialog = remote.require('dialog');
var fs = require('fs');

$('#chooseFile').click(function() {
  dialog.showOpenDialog({
    title: '选择文件',
    properties: ['openFile'],
    filters: [{
      name: 'Text',
      extensions: ['txt']
    }],
  }, function(fileNames) {
    var text = fs.readFileSync(fileNames[0])
    $('#output').text(text);
  })
})
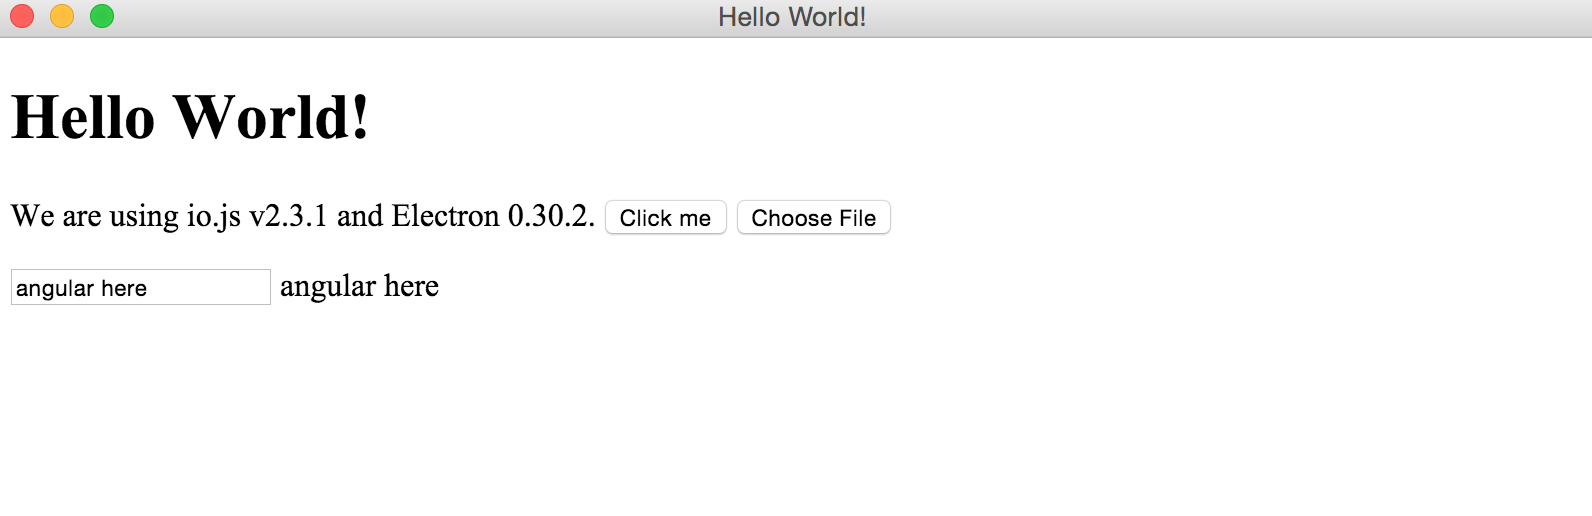
5. 使用 angular.js
MVC 框架横行其道的年代,怎么都要使用个什么框架开发,然不让出门都不好意思跟人打招呼。
bower install angularjs
在 index.html 引用 angular, body 配置 module your-app。
<body ng-app="your-app">
  ...

  <!-- 输入框输入什么,右边就显示什么 -->
  <input type="text" ng-model="input">

  <!-- 引用 angular -->
  <script src="bower_components/angularjs/angular.min.js"></script>
  <script src="index.js"></script>
</body>
效果如下
index.js 加入以下代码
angular.module('your-app', [])
.controller('DemoCtrl', function($scope) {
})
6. 打包
应用开发完成后,最终需要打包成直接可以执行的应用给用户使用。这里直接使用 gulp-electron 一个 gulp 插件来自动化打包。
为了能够使用 gulp-electron 这个插件,需要先调整下目录结构。
your-app/
├── bower_components
├── package.json
├── main.js
├── index.js
└── index.html

# 改成下面的结构

your-app/
├── src
|   ├── bower_components
|   ├── package.json
|   ├── main.js
|   ├── index.js
|   └── index.html
|
├── package.json
└── gulpfile.js
# 安装 gulp
npm install --global gulp
npm install --save-dev gulp

# 安装 gulp-electron 插件
npm install --save-dev gulp-electron
添加 gulpfile.js
var gulp = require('gulp');
var electron = require('gulp-electron');
var packageJson = require('./src/package.json');

gulp.task('electron', function() {

    gulp.src("")
    .pipe(electron({
        src: './src',
        packageJson: packageJson,
        /* 打包输出目录 */
        release: './release',
        cache: './cache',
        /* electron 版本 */
        version: 'v0.30.4',
        packaging: true,
        /* 打包的平台 */
        platforms: ['win32-ia32', 'darwin-x64'],
        platformResources: {
            darwin: {
                CFBundleDisplayName: packageJson.name,
                CFBundleIdentifier: packageJson.name,
                CFBundleName: packageJson.name,
                CFBundleVersion: packageJson.version,
                /* 应用图标 */
                icon: 'gulp-electron.icns'
            },
            win: {
                "version-string": packageJson.version,
                "file-version": packageJson.version,
                "product-version": packageJson.version,
                /* 应用图标 */
                "icon": 'gulp-electron.ico'
            }
        }
    }))
    .pipe(gulp.dest(""));
});
执行打包,第一次会将不用平台的需要的文件下载到 cache 目录下,后面则直接使用。打包后输出的文件在 release 目录下, 两个不同平台的 zip 包就可以给用户使用了。
gulp electron
完整代码在这里 electron-example。
